That old car sitting in your garage. You know the one. It’s got character, a history, but let’s be honest—its gas-guzzling days feel… well, a bit outdated. What if you could give it a new lease on life? A quieter, cleaner, and frankly, more thrilling one?
That’s the magic of a DIY electric vehicle conversion. It’s not just a mechanical project; it’s a transformation. You’re swapping out the car’s fossil-fuel heart for a sleek, electric soul. It’s a challenging, deeply rewarding journey, and this guide is your roadmap to the essential components and knowledge you’ll need to get started.
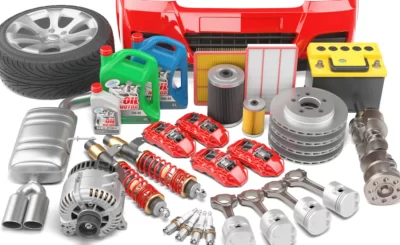
The Core Components of Your EV Conversion Kit
Think of building an EV like assembling a high-tech puzzle. Every piece has to fit and work in harmony. Here are the non-negotiable parts you’ll be sourcing.
The Powerhouse: Electric Motor and Controller
This is the new engine of your car. You have a few main choices here, each with its own personality.
- DC Motors: The classic choice for beginners. They’re simpler to wire and control, often more forgiving on the wallet. The downside? They can be a bit heavier and less efficient than their modern counterparts.
- AC Motors: This is the tech you find in most new production EVs like Teslas. They’re more efficient, lighter, and offer fantastic regenerative braking. The complexity and cost are higher, though—both for the motor and its controller.
- Motor Controller: This is the brain of the operation. It sits between your battery pack and the motor, precisely regulating the power flow. When you press the “gas” pedal, you’re actually talking to the controller. It dictates acceleration, top speed, and overall performance.
The Fuel Tank 2.0: The Battery Pack
This is, without a doubt, the single most important—and expensive—part of your build. Your battery pack determines your car’s range, its power, and its soul. The landscape here has shifted dramatically towards lithium-ion batteries (like LiFePO4). They’re lighter, more energy-dense, and have a longer lifespan than the old lead-acid options.
Sourcing batteries is an art. Many converters use salvaged modules from wrecked EVs or buy new cells from reputable suppliers to build a custom pack. You’ll need a Battery Management System (BMS) to keep everything in check. The BMS is the guardian angel of your pack, monitoring cell voltage and temperature to prevent damage and ensure longevity.
The Supporting Cast: Chargers, Adapters, and More
A symphony needs more than just a lead violin. Your EV conversion relies on a few other key players.
- DC-DC Converter: Your battery pack runs at a high voltage (often 100V+). But your lights, radio, and wipers need standard 12V power. The DC-DC converter does this job, replacing your old alternator.
- Charger: You’ll need an onboard charger to plug into a standard wall outlet (Level 1) or a dryer plug (Level 2). This is what fills your “tank” overnight.
- Adapter Plate and Coupler: To save on complexity and cost, many DIYers keep their car’s original manual transmission. An adapter plate allows you to bolt the new electric motor directly to the existing transmission bell housing.
Your Step-by-Step Conversion Guide: A Realistic Overview
Okay, you’ve got the parts. Now what? Let’s walk through the general process. It’s a dance of destruction and creation.
Phase 1: The Teardown
This is the point of no return. You’ll meticulously remove the internal combustion engine, along with all its associated parts: the fuel tank, exhaust system, radiator, and all those belts and hoses. It’s a messy, greasy, and incredibly satisfying job. Label every wire and hose you disconnect. Trust me, future-you will be grateful.
Phase 2: The Heart Transplant
With the engine bay empty, it’s time to fit the new electric motor. This is where the adapter plate and coupler come into play. You’re essentially creating a bridge between the 21st-century motor and the (possibly) 20th-century transmission. It requires precision and patience.
Phase 3: Wiring the Nervous System
This is often the most intimidating part for newcomers. You’re running high-voltage cables from the battery pack to the controller, and from the controller to the motor. You’re also integrating the 12V system with the new DC-DC converter. Safety is paramount here. Use the correct, color-coded high-voltage wiring and proper connectors. No sketchy electrical tape splices allowed.
Phase 4: Finding a Home for the Batteries
Where do you put several hundred pounds of batteries? This is a critical design challenge. Common spots include the engine bay (for some weight balance), the trunk, or, most ideally, in a custom frame in the tunnel where the exhaust used to run. The goal is to keep the center of gravity low and the weight distribution even.
A Realistic Look at Cost and Viability
Let’s talk numbers. A full DIY conversion is rarely a way to save money compared to buying a used Nissan Leaf. It’s a passion project. Here’s a rough breakdown of where your budget goes.
| Component | Estimated Cost Range |
| Battery Pack | $4,000 – $15,000+ |
| Motor & Controller | $1,500 – $5,000 |
| Adapter Plate & Coupler | $500 – $1,500 |
| Charger, DC-DC, Cables | $1,000 – $2,500 |
| Miscellaneous (Cooling, Mounts, etc.) | $500 – $2,000 |
As you can see, it adds up fast. The total can easily land between $8,000 and $20,000, not including the cost of the donor car or your time. And that’s the real kicker—your time. This isn’t a weekend project. It’s months, sometimes years, of dedicated work.
Is a DIY EV Conversion Right for You?
So, who actually takes this on? It’s not for everyone. You need a solid foundation in mechanics and a willingness to learn high-voltage electrical systems. You need patience, a good workspace, and a budget that has some flexibility. Frankly, you also need a high tolerance for problem-solving and frustration.
But the reward? It’s immense. The first time you turn the key and your car moves forward in utter silence, powered by your own two hands… it’s a feeling that’s hard to describe. It’s a connection to a machine that most people never experience.
You’re not just saving an old car from the scrap heap. You’re reimagining it. You’re taking a piece of the past and wiring it directly into the future. And that, well, that’s a project with a soul.